You can create and assign an activity or a reminder call for a Lead/Customer and assign it to your team members.
This works same as you create a reminder or a call for yourself, check out this article for more details.
1. How to create and assign an activity to your team member?
Now you can create and assign your team with the activity, like reminder call or follow-up with the Lead, which will be also created as the event in their calendar.
Heres how to do that:
STEPS:
Lead> Activity> Add Activity
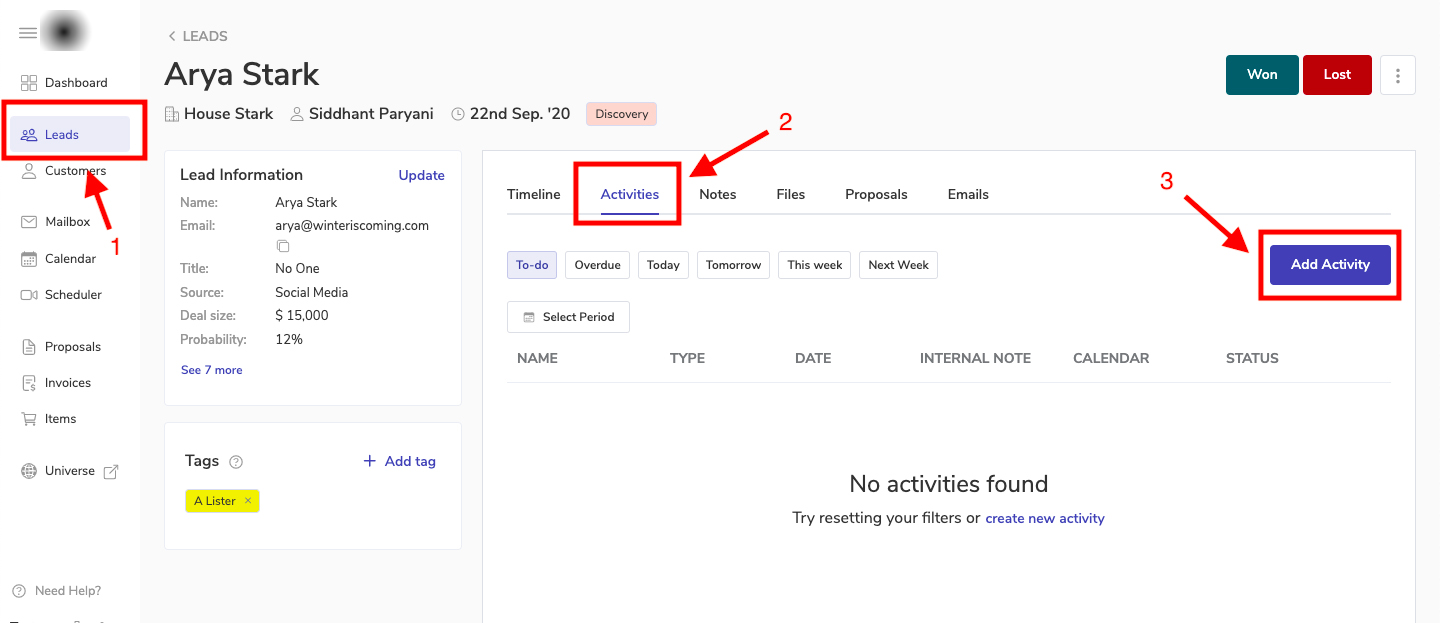
Open Leads module, and click on the lead for which you want to add a an activity or a call.
After opening the lead, click on Activities tab, inside which you will get the “Add Activity” option as provided in the below screenshot:
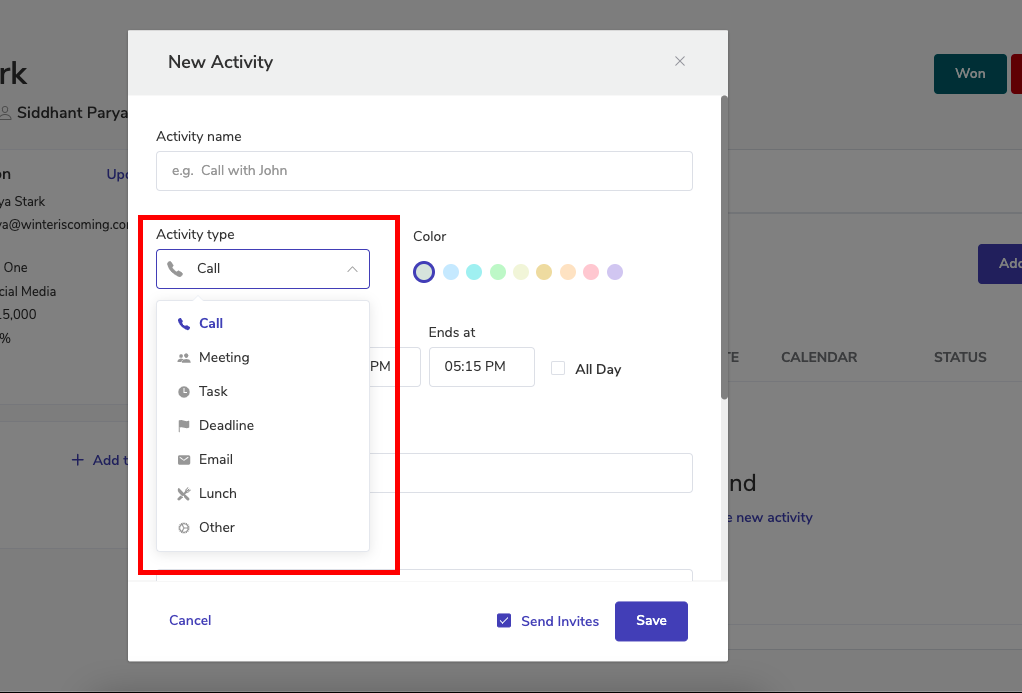
After clicking on “Add Activity” you will be getting various options for the activity type, like Call, Meeting, Task, Deadline, Email, Lunch, Other that you would want to create for that Lead, as shown below:
Details that you can also add after you select the Activity type:
1. Activity name– That you want to keep it for that meeting or call 2. Color– you can change the color to be easily identify your created activity from your teams, or activity typ identification. 3. Activity Date– with start and end time, and “All Day” reminder option 4. Add Guests– By default it will consist of the lead’s email in guests section, you can remove that if you wish not to send any invite to the lead.
5. Linked to Lead/Customer– You can link the activity to any lead or customer, by default it adds the lead you have opened. 6. Internal Note– You can set internal note for yourself or the team to understand the status of the activity. 7. Description– You can add detailed description for this particular activity.
8. Select Calendar– You can select the calendar inside which the activity should be created. 9. Location– You can add the location where your team mates are involved in the activity, like a personal video meeting link or conference room if you are working from office 🙂 10. Mark as Done– You can directly tick this option if you have completed the activity already but for sake of keeping the records you are creating it. It will help new team members on the activities performed on that Lead/Customer. 11. Send Invites and Save– Send invite will send the email invite to the users added inside the guest list, you can untick it to avoid sending the invite. If you are only added into the guest list then it will only be synced within your calendar. Save– You can simply save the activity for it to get enabled.
2. How to assign the activity to your team member?
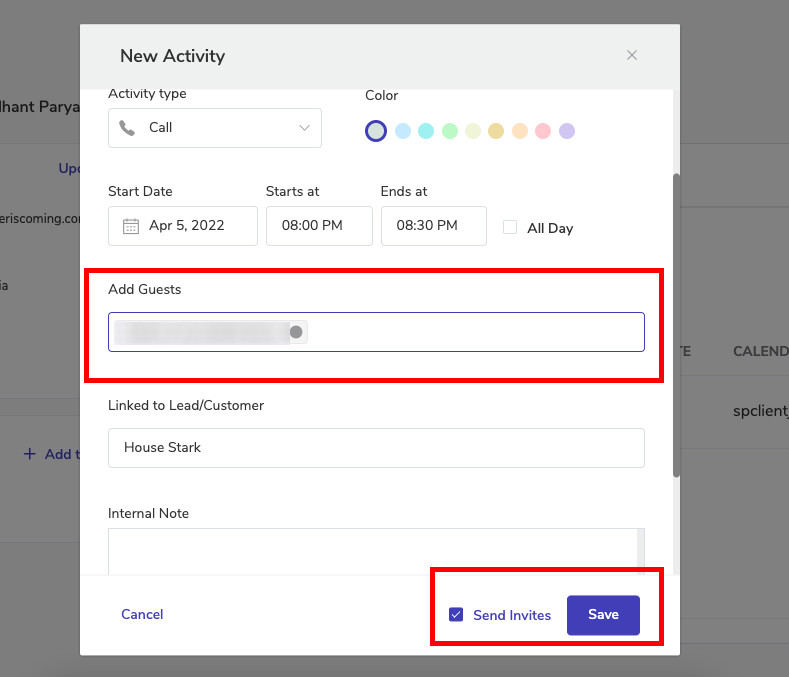
You can add your team member into the “Add Guests” section at the time of creating the activity, please refer to the screenshot below:
To assign this to your team member only, you will need to remove Lead’s email and add your team member’s email, and tick “Send Invites” and save the activity. The activity will be then synced in with their respective calendar.
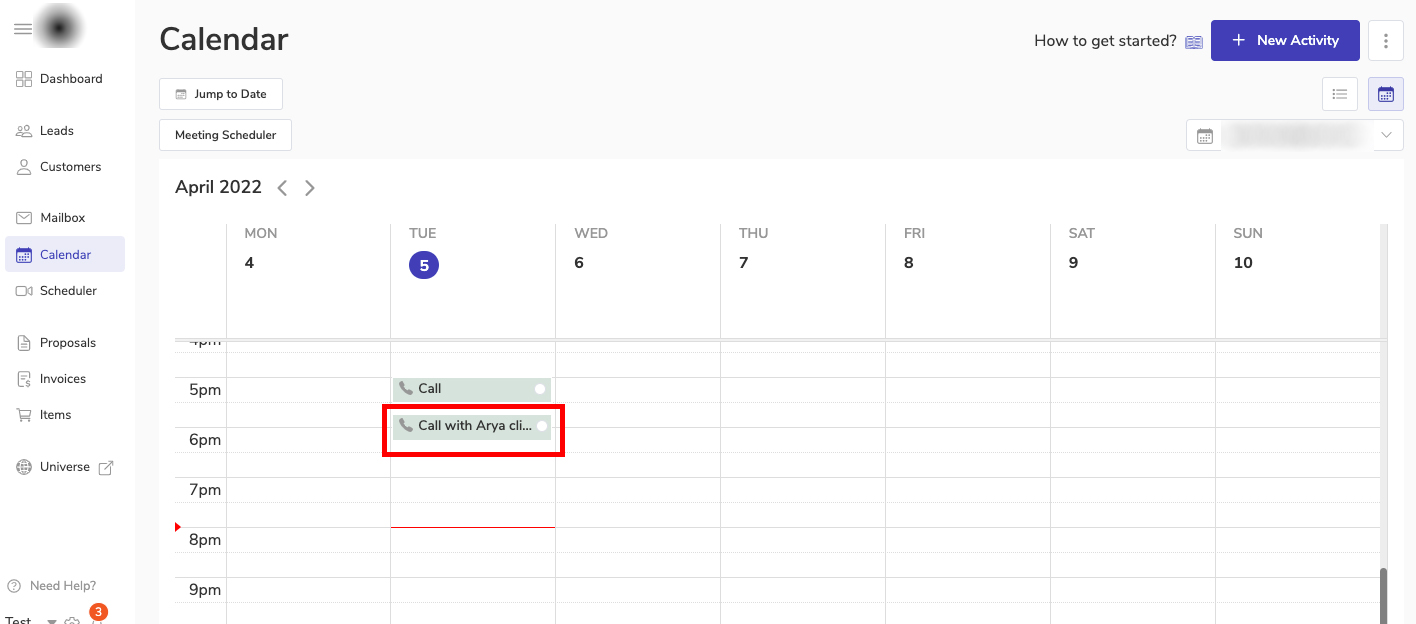
After you save it, it will then send the email invite and will be synced with the team member’s Calendar
Once the team member completes that activity, they can change the status to “Mark as Done” from Timeline or from their Calendar as shown below:
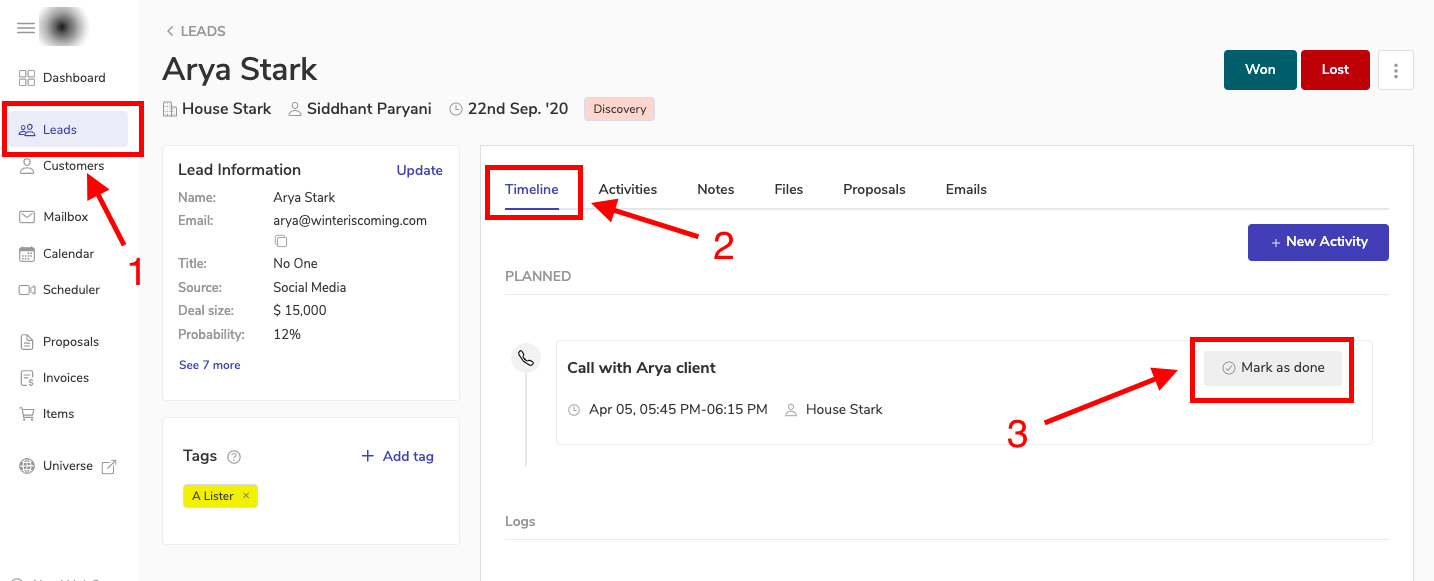
Under Timeline:
Open that lead from the Leads module
Click on Timeline (by default it opens once the lead is opened)
You can see “Mark as Done” option on the on the right side of that particular activity
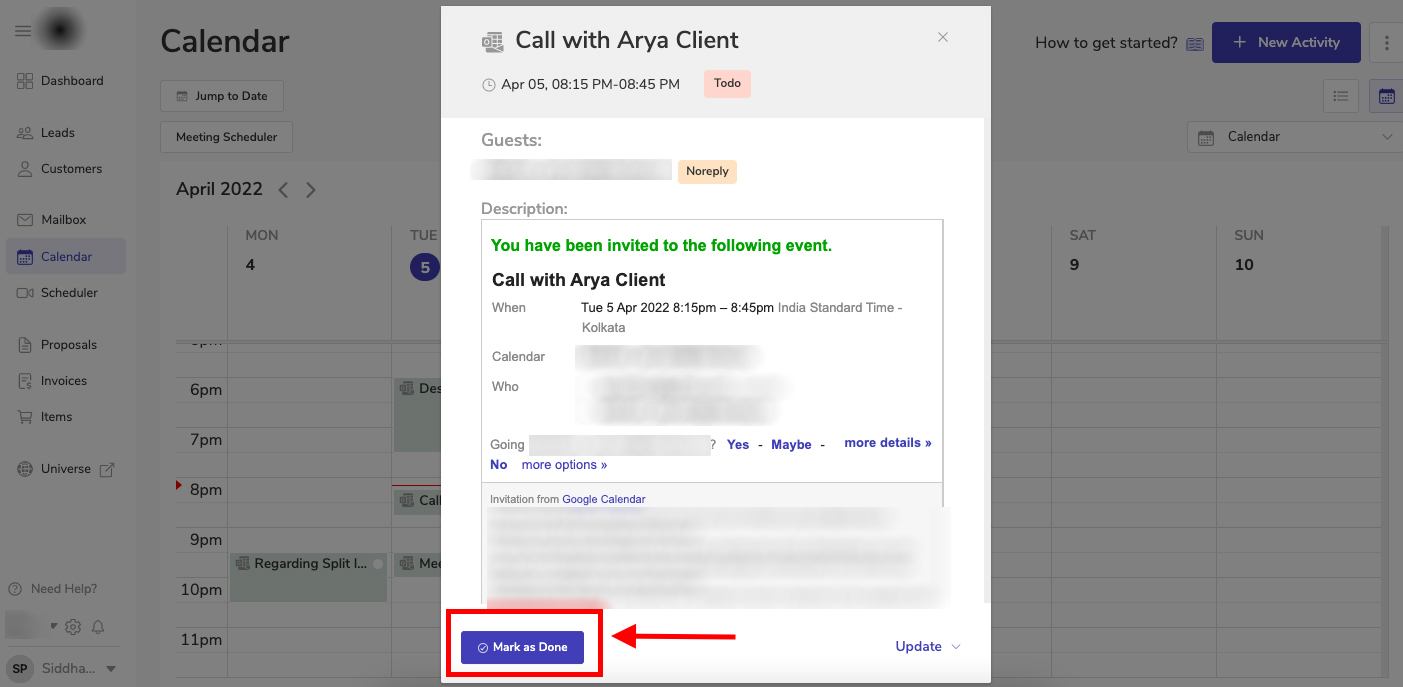
Under Calendar:
Open your Calendar module
Click on that particular event/activity inside your Calendar.
A pop-up window will open with that call details, there you can Mark it as done and update as well


