Warning: Trying to access array offset on value of type bool in /home/u804697833/domains/onshowcreative.populis.click/public_html/wp-content/themes/tessera/includes/bs4breadcrumb.php on line 100
Create and edit forms in Calendly
With Routing Forms, you can direct visitors to specific people or destinations based on their industry, company size, specific interests, and more.
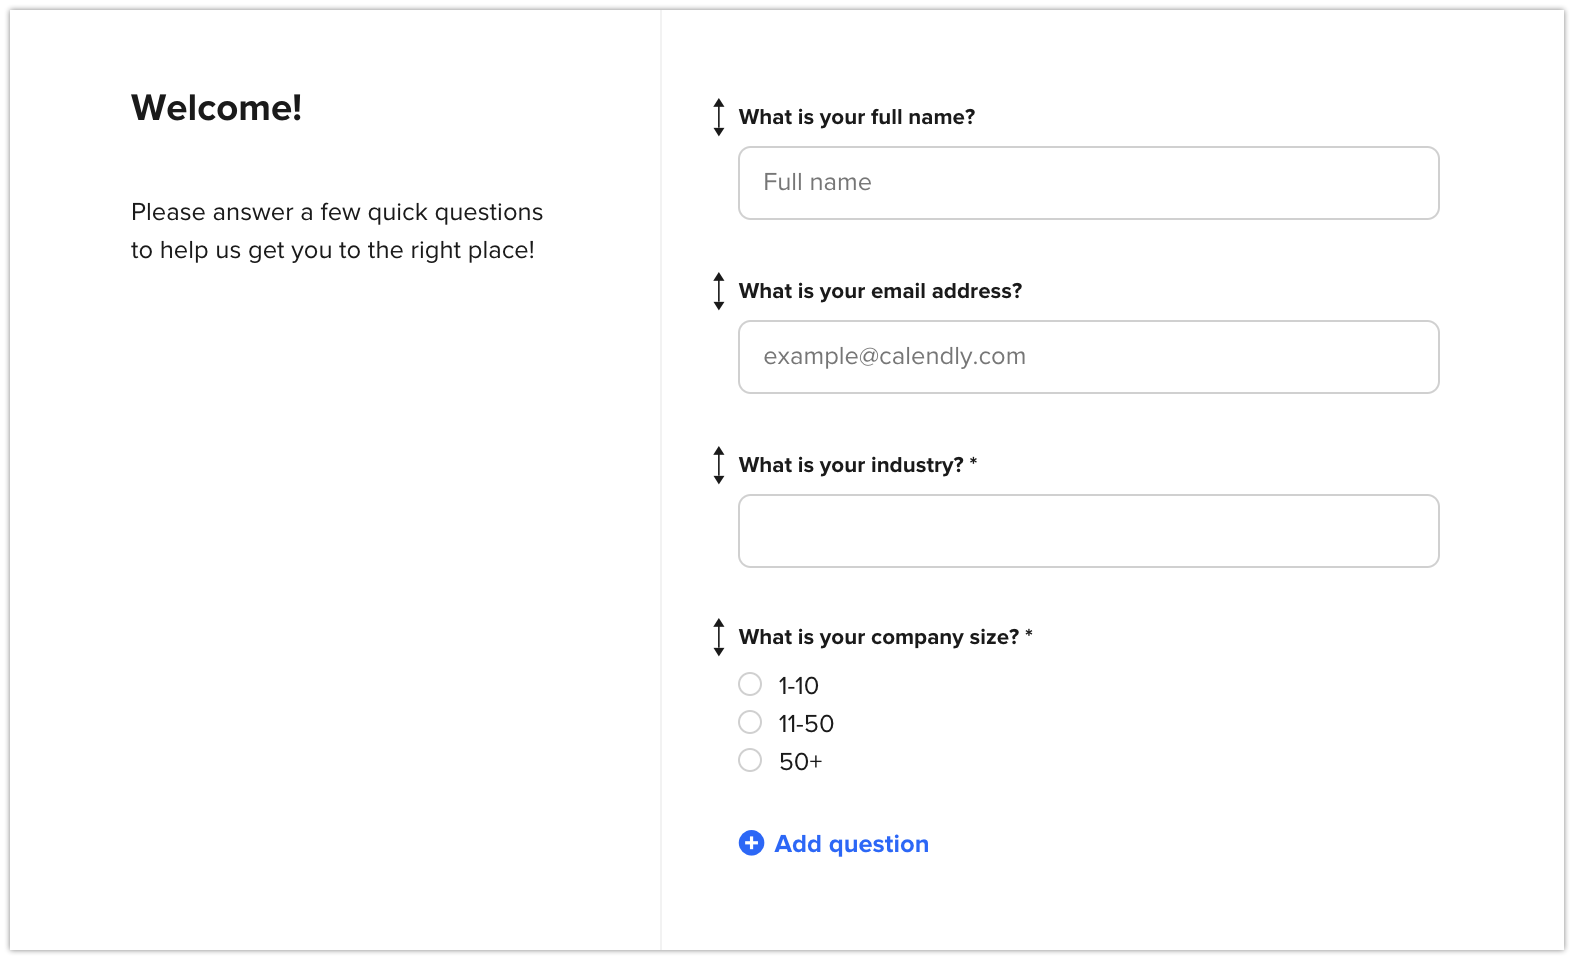
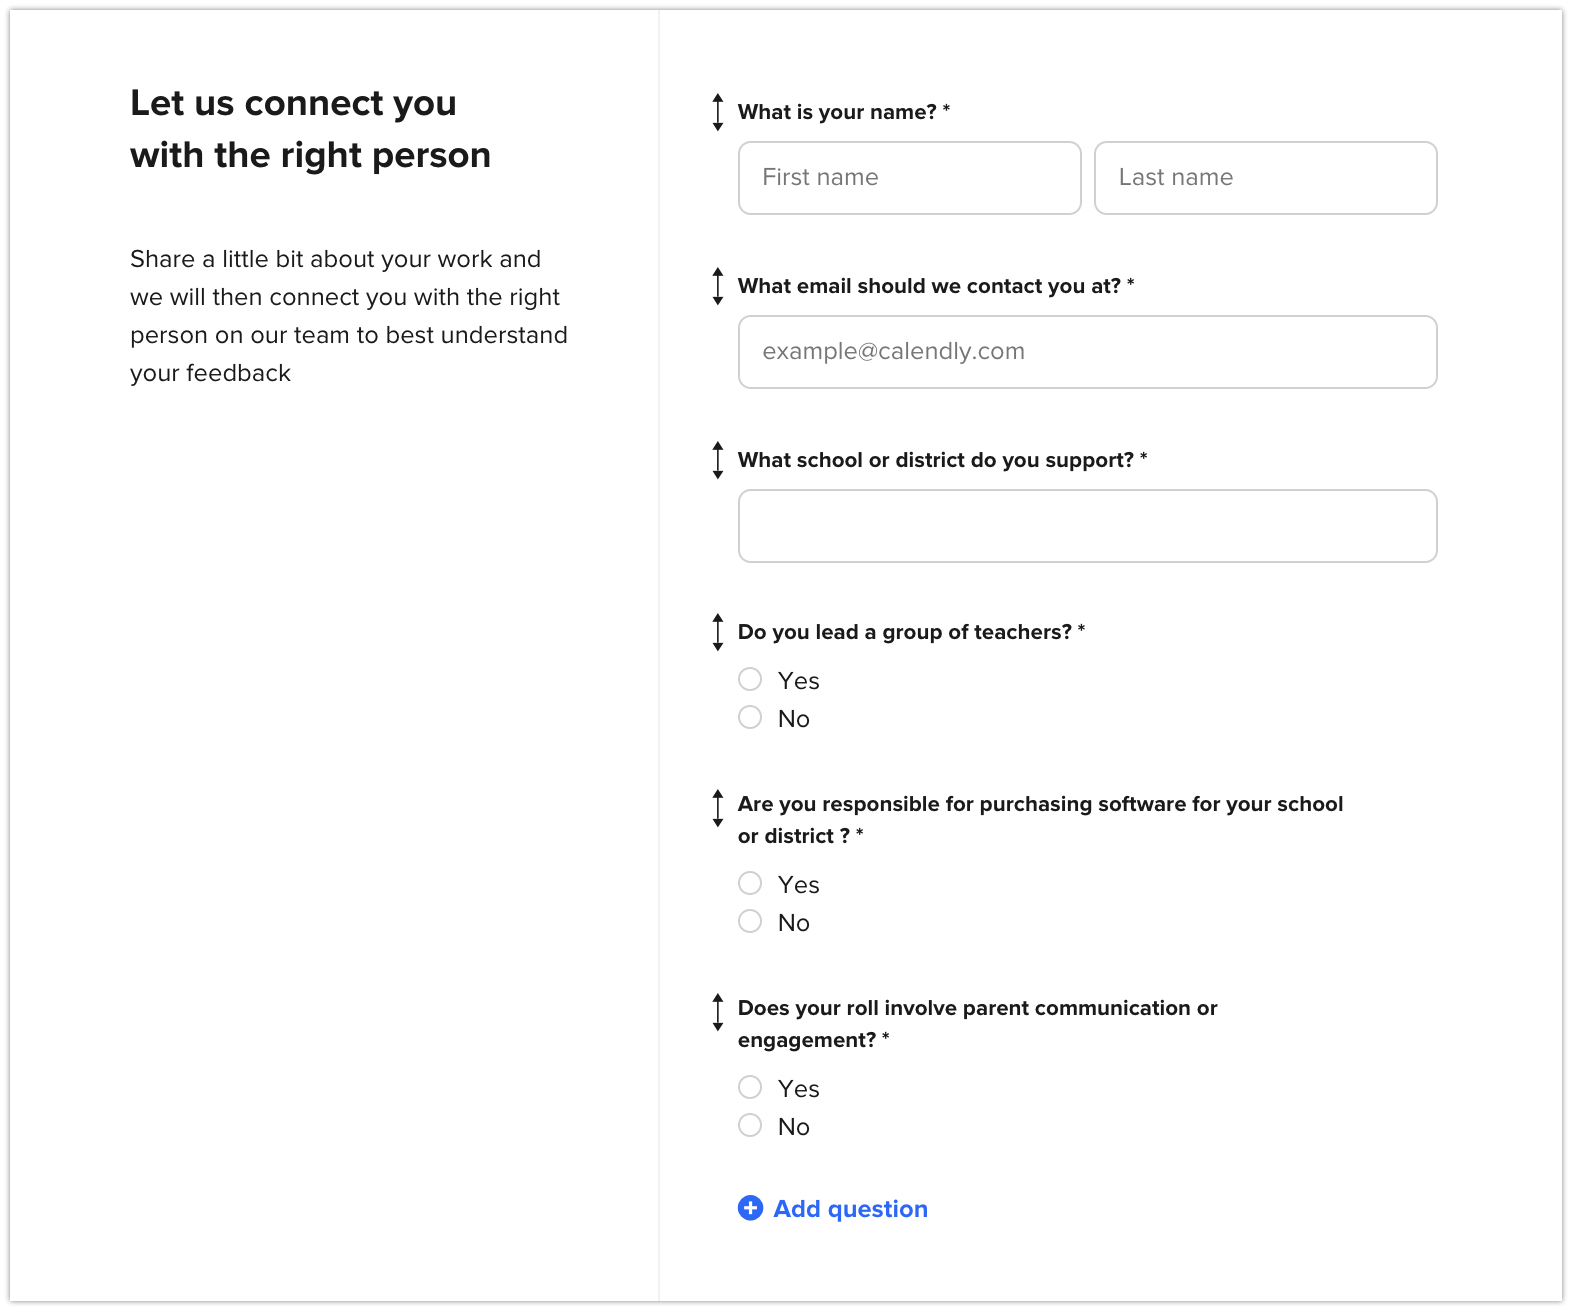
Example intake form
Once you’ve built your form and routing logic, Calendly will gather details about your visitors and automatically route visitors to the right person or team based on conditions in your routing rules.
Benefits
Increase conversions and customer satisfaction
Collect your visitors’ details at the height of their interest
Reduce time to connect with your team
How to set up Routing Forms
Before you begin…
Only owners and admins can create Routing Forms (but all users can share them!)
You’ll need to be on a Professional, Teams, or Enterprise plan.
From the Routing Forms tab, all users in the account can view and share any Routing Form.
For a user to edit a form, owners or admins must grant them editing permissions.
Step 1: Build your intake form
Blank intake form
From your Home page, select Routing Forms.
Select New routing form.
Enter a name for your routing form, then select Create form. ⭐ Tip: This is only an internal name. Only users within your organization will see this, so choose a name that’s unique and easy to find.
Build your intake form that visitors will land on:
To add a headline and description, toggle on Include headline and description.
Select + Add a headline. Enter a headline for your form, and select Save. ⭐ Tip: Choose an action item like “Connect with us.”
Select + Add a description, and select Save. ⭐ Tip: You can share instructions, more context, or link to an external site.
Select + Add a question, and select your preferred question format. Select if you’d like to make the question required. ⭐ Tip: Common questions include company size or area of interest. ❗ Note: You can only create routing rules from radio button or dropdown responses. You cannot create rules from other responses, like free-response text.
When you’re happy with how your intake form looks, select Next.
Step 2: Set up your routing rules
You can set up a few different types of routes:
Screening routes
Booking routes
A fallback route
Note: You can have multiple screening and booking routes but only one fallback route.
Screening routes
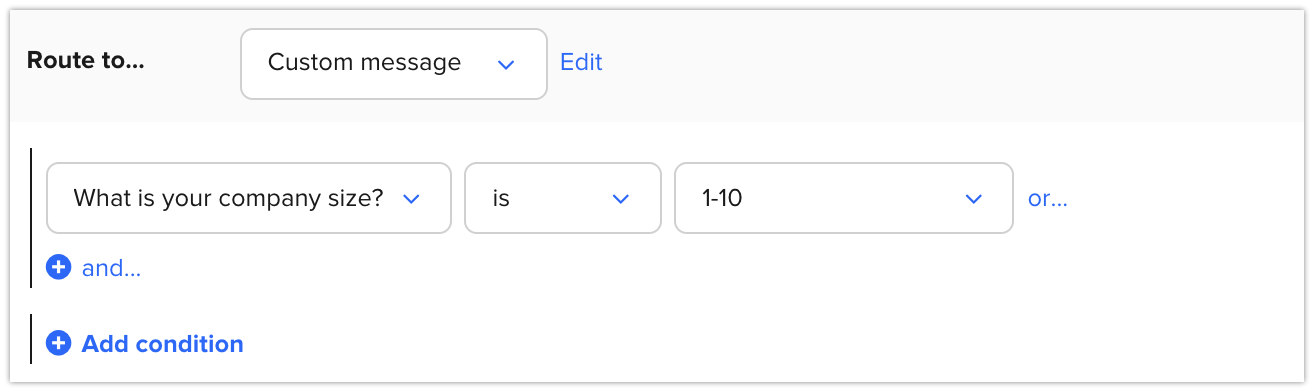
Screening routes filter out people you don’t want to meet with. Instead of letting people book, you can redirect them to a URL of your choosing or show them a custom message that informs them what to do next.
Example: If a visitor’s company size is between 1-10 employees, they cannot book with you and will instead be routed to a custom message.
Example screening route for disqualified company size
To set up screening routes:
From the Routing logic tab, select +Add a route.
Under Route to…, decide where to route disqualified visitors:
Custom message: Select Edit to customize a message, then select Apply.
External URL: Enter a URL.
Choose the question, qualifier, and answer that you’d like to use to disqualify visitors.
To further customize the condition, select or… or and.
To add more conditions, select + Add Condition.
Once complete, select Save route.
To add another screening route, select +Add a route.
Booking routes
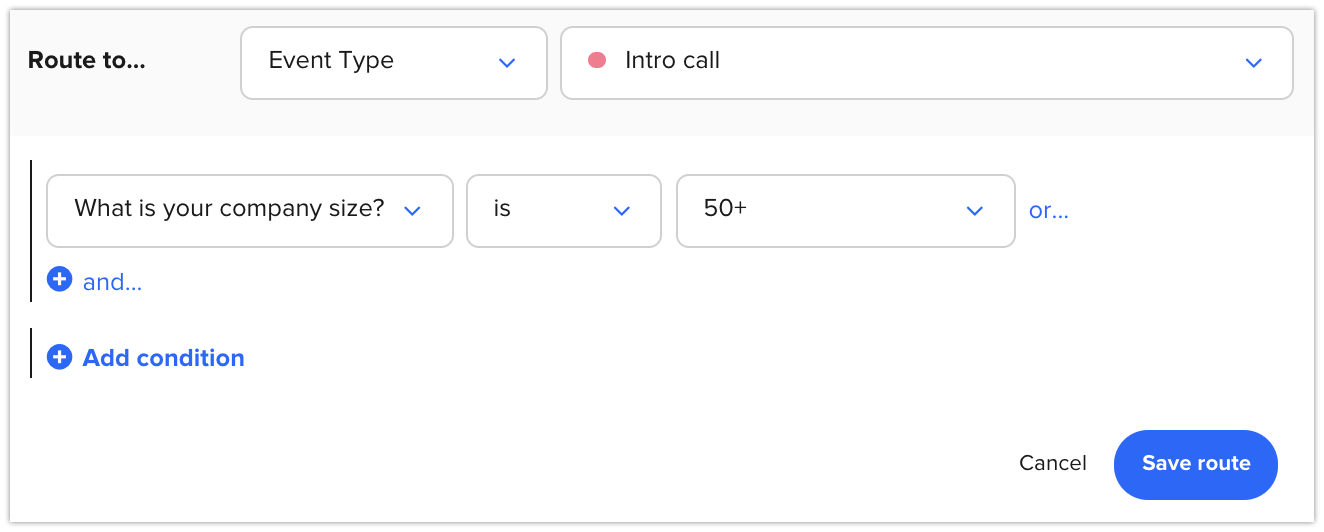
Use a booking route for people you want to meet with or visitors you’re interested in but want to redirect to a URL.
Example: If a visitor’s company size is greater than 50 employees, they can book an Intro call with your team.
booking route for qualified company size
To set up booking routes:
From the Routing logic tab, select +Add booking route.
Under Route to…, decide where to route qualified visitors:
Event type: Select an event type. ⭐ Tip: You can select any event type for any user or team in your organization.
External URL: Enter a URL.
Choose the question, qualifier, and answer you’d like to use to qualify visitors.
To further customize the condition, select or… or and.
To add more conditions, select + Add Condition.
Once complete, select Save route.
To add another screening route, select +Add booking route.
Fallback route
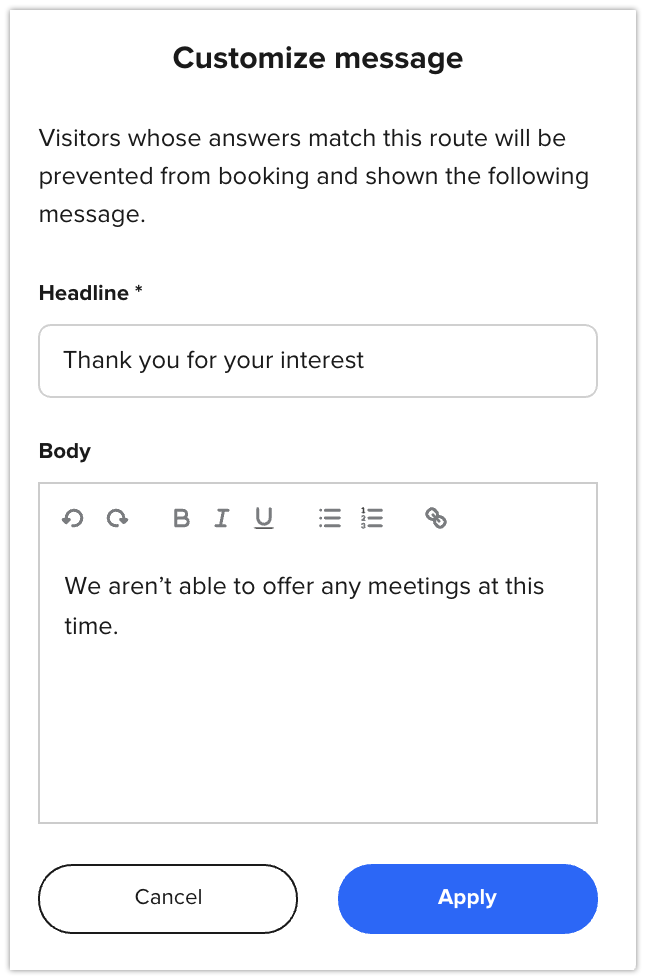
The fallback route applies to all people whose responses don’t match a screening or booking route. You can choose to offer visitors a meeting or show them a custom message.
Example: If somebody doesn’t meet any of the conditions captured in a screening or booking route, they’ll be sent to your fallback custom message.
Example of a custom message you can create
To set up a fallback route:
Under In all other cases route to, select:
Custom message: Select Edit to customize a message, then select Apply.
Event type: Select an event type.
External URL: Enter a URL.
Step 3: Publish and preview your form
Select Publish form once you’re happy with your intake form and routing logic. ⭐ Tip: Test out your form! Exit the modal and select Preview form. Your responses aren’t recorded when previewing.
Step 4: Share your form
Select Save and Share.
Choose how to share your form:
Add to website: View Embedding Calendly on your site for more details.
Share a link: Select Copy link, and share your link in a message.
Final Routing Form
How to edit Routing Form permissions
At the bottom of your Intake form or Routing logic, select Edit permissions.
Type in the name(s) of the user(s) you’d like to share editing permissions with. ❗ Note: By default, owners and admins can edit all forms.
Select Apply.
How to export results
Once your Routing Form is live, you can export the results to view visitor details.
From your Home page, select Routing Forms.
Locate your form, and select the three dots next to it.
Select Export Results.
Open up your downloaded results to review visitor details.

