You can bring Leads in bulk in popCRM. You can export the data from other tools in CSV format and then can import that in popCRM easily.
Things to ensure before you begin import:
If you have fields in your CSV file which doesn’t exist in popCRM then first you need to create custom fields for these leads to capture additional information. How to create custom field? In the import, you’ll be asked to map your CSV columns with the Lead’s fields.
When using custom fields that allow specific lists ( lists, dropdowns, selects, etc.) ensure that all possible values are pre-populated in popCRM’s custom fields. This will prevent any mismatch values or duplicate values. popCRM will ignore the case (capital case or small case) mismatch but if there are any spaces or character mismatch then you will get an error.
Make sure that all mandatory fields in your Leads are present in the CSV file. Sometimes you create custom fields that are mandatory for Leads. Ensure that those fields are populated in the CSV file.
Do not use comma-separated values for popCRM’s existing fields of Lead’s contact information like email and phone number. If you have comma-separated values then add new custom fields to retain them.
Please remove extra spaces in the beginning or end of the words if any.
Date formats that are accepted are ‘MM/DD/YYYY’, YYYY/MM/DD, or ISO format (2022-02-08T10:41:00.652Z).
Ensure your CSV file is UTF-8 encoded. Most of the exporters give in UTF-8 format only.
Lead’s having the same email id will be considered duplicates.
Deal size’s currency will be auto-set to the workspace’s default currency.
Steps for Importing:
Navigate to Import
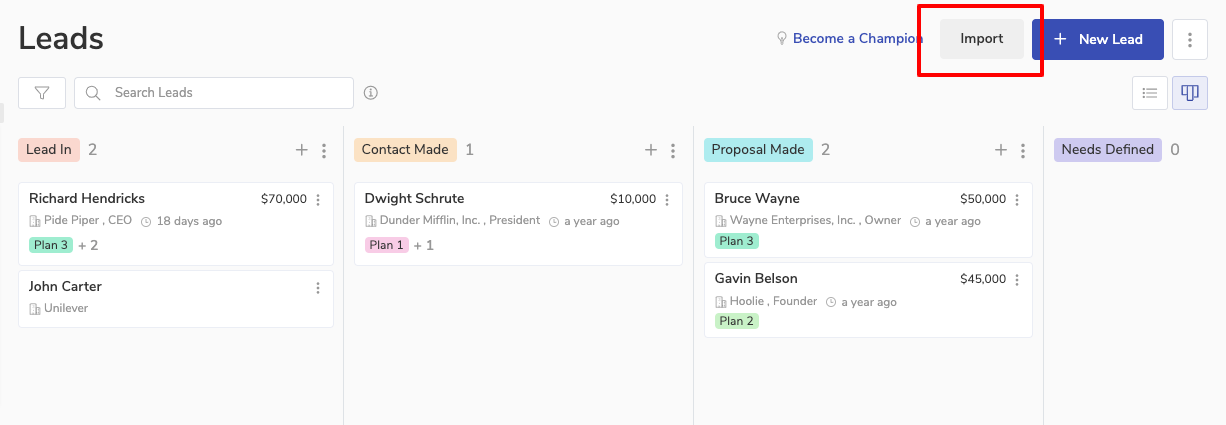
You can navigate to your Leads page. You’ll see the Import button as shown below. Click on it.
Read the Instructions
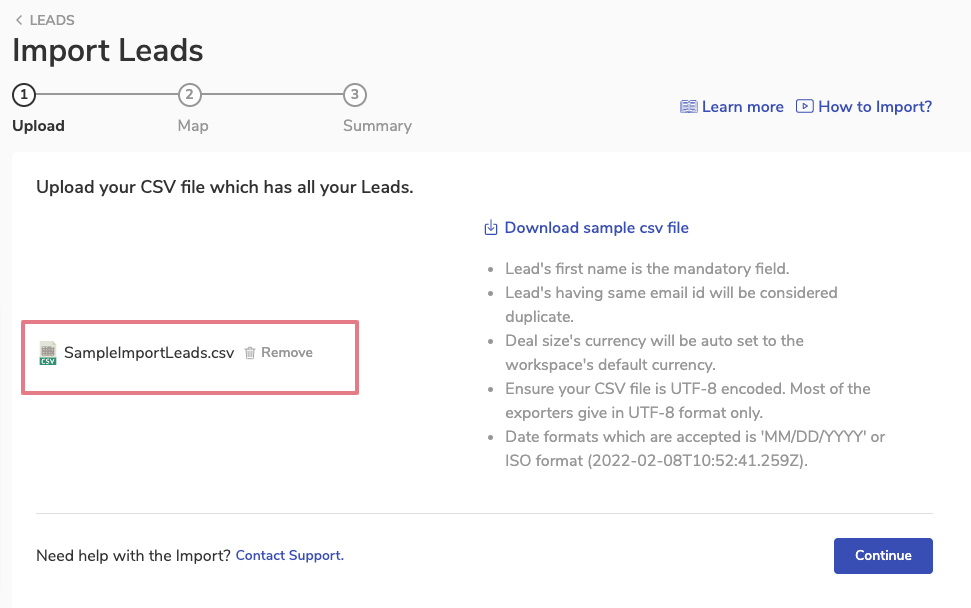
You will see the below screen. Read the instructions given on the page.
✍️ Note: You can download the sample file to know your CSV file should look.
Upload the CSV file
You can upload your CSV file by clicking on the upload file or by dragging and dropping it.
✍️ Note: Your CSV file should be smaller than 10 MB. If bigger then please split the records into multiple files.
Once uploaded your file will be shown to you like in the below image
Click on the continue button to proceed.
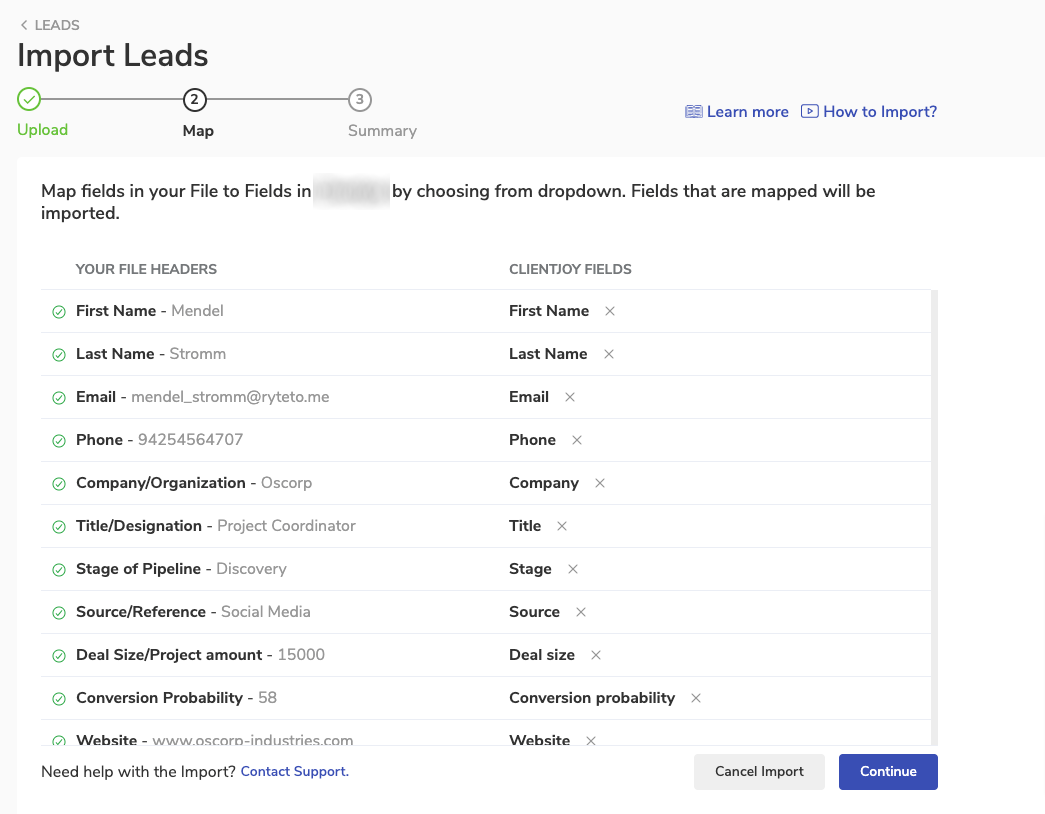
Map the CSV Headers
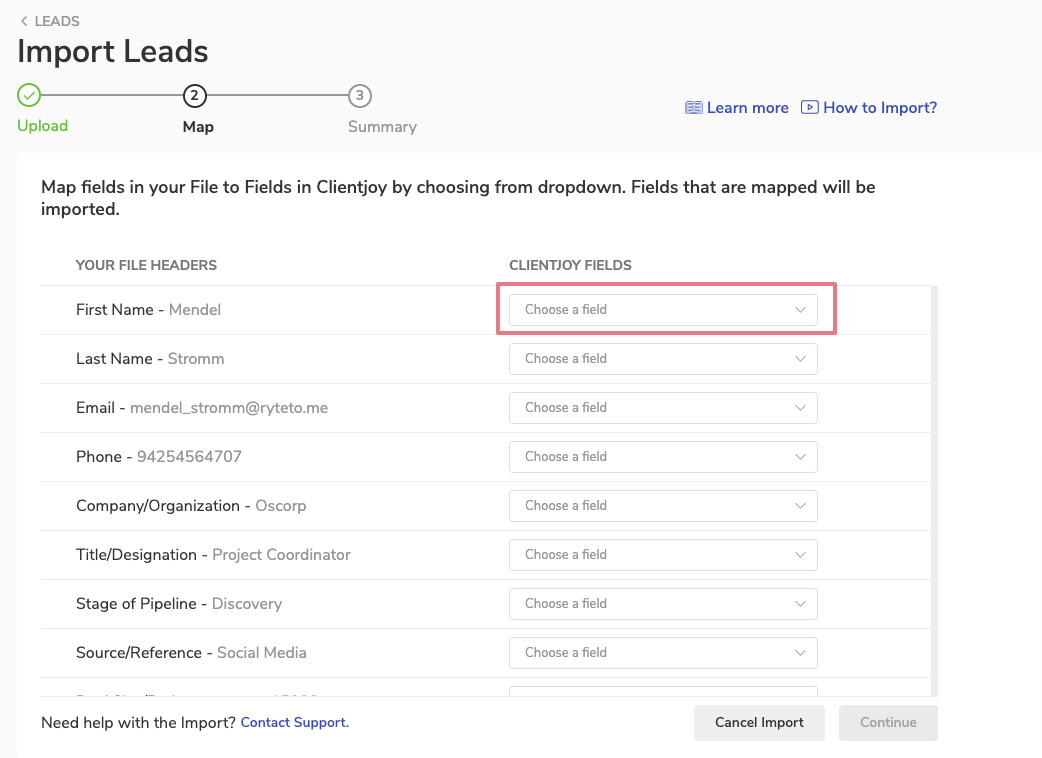
Next is mapping. You will be shown your file headers, next to it you’ll see the first record picked from your CSV file for reference. Next to it, you’ll be asked to map the CSV headers with your Lead’s fields in popCRM. Click on the choose a field dropdown next to your file header
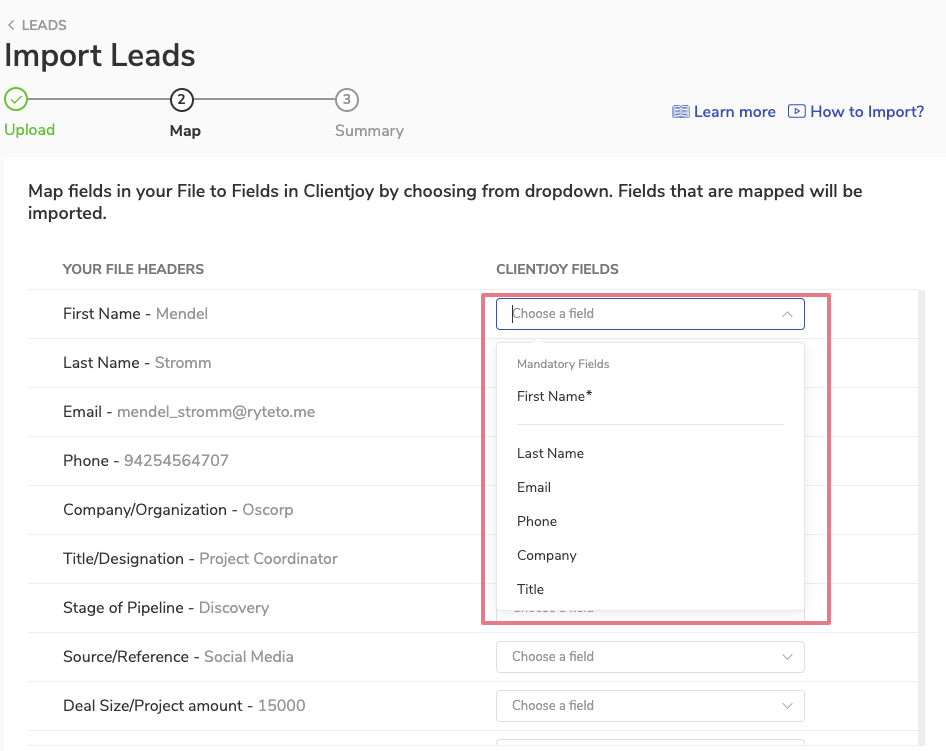
This will open up the list of all popCRM fields including your custom fields. All mandatory fields will come on top. Choose the correct popCRM field which should capture the information of your CSV file.
After mapping all the fields, click on continue.
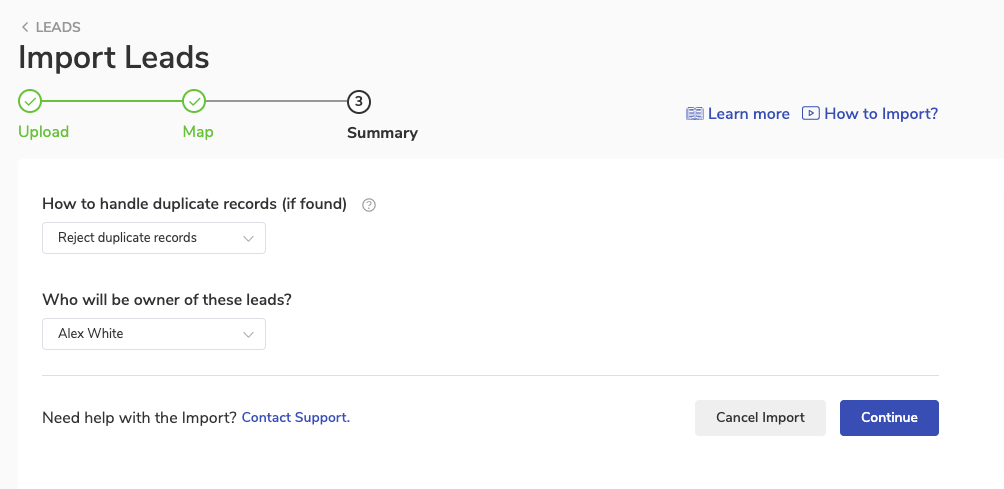
Summary Stage
Next, you’ll be asked to specify how to hand the duplicate records? You can create duplicate records or can ignore duplicate ones. Duplicate emails will be considered as duplicate records, any other duplicate information will be ignored.
You can also define who will be the owner of these new Leads. You can choose from the list of your teammates and can assign them the Leads.
You can also add tags to all the new leads to easily identify them. You can use the lead source, date of import, etc. as the tag.
Once done, click Continue to start the Import.
Import Start
Your import will begin now. It can take a while to import your CSV file so you can resume your work. Once imported you’ll be notified via popCRM notification and email
Import Complete
You’ll receive a notification on your notification bar when the Import is done.
You’ll also receive an email notification when your Import is done.
You need to update your browser permissions to enable Browser Notifications. You can do so from the Privacy and Security settings of your browser.
How to know and handle errors in Import?
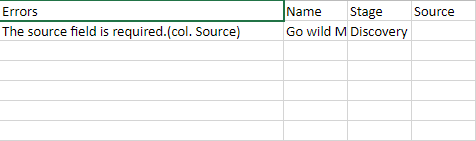
If there are any errors in the Import then you’ll be sent an email with the number of records in which the error came. There will be an attached file in the error which will have all the records which had errors.
You can open the CSV file attached and the first column will tell you the error in each record as shown below
Note: You can make corrections in the error CSV file only and can import again.


